*These are just my favorite items, they are not required and I will also discuss alternatives.
I LOVE using a wide mouth pint mason jar for my starter. It hold 2 cups which is plenty big enough for any feeding and I like how easy it is to stir the feedings with the wide mouth. I use a white plastic lid on the jar when my starter is in the fridge and a clear shower cap with a knot tied in it when my starter is on the counter just after being fed. I feed my starter with unbleached bread flour and I stir it with an OXO good grips silicone jar spatula, I love the curved edge on this spatula for scraping the sides of the jar really well after a feeding! A rubber band is a must on your starter jar so that you can monitor it's growth.
Alternatives: In place of a mason jar you could always use any jar you have around the house or even a jar from your fridge or pantry that you've recently emptied and sterilized. Like a jelly or pickle jar. I do only recommend using a glass jar and watch metal lids for rust. In place of a shower cap you can use Saran Wrap or a kitchen towel on your jar after a feeding. In place of a spatula you can use any spoon to stir your starter, contrary to other articles I've read, I really don't think it has to be wooden, a metal spoon should be just fine.
When I prepare my dough I use a 2 quart glass casserole dish. I mix my dough with the same spatula I stir my starter with to get all the flour combined and once it's in a shaggy ball I take over with my hands. While my dough rests in between stretches and folds I have a clear shower cap on the dish.
Alternatives: You can mix your dough in any container available to you as long as it's the correct size. You can mix your dough by hand and cover with either Saran Wrap or a kitchen towel.
When it is time to proof your dough it is recommended to do so in a straight edged container so you can monitor it's growth. I use a 4 quart cambro container with a lid. It is recommended to use a container with a lid because you need to create a warm humid environment for proofing. If you use Saran Wrap or a towel during this step you are allowing the moisture to escape which will effect the rise of your dough. The measurements on this container help you see where your dough started and where you want it to end up before you shape and place in the fridge.
Alternatives: Any clear straight sided container will work like Tupperware or canisters. You can use a sharpie or dry erase marker to mark where your dough starts.
Now that your dough is done proofing it is time to tuck it away in the fridge for a cold proof, usually done for 6-36 hours. I shape my dough on my floured counter and flour the top generously which will be placed top side down into the banneton. I keep the liner in my banneton AND use a flour sack towel. I think I'm the only person on the planet that uses both the liner and a towel but it's what I started doing and just continued... I use a flour dusting wand to sprinkle the rice flour on my counter and on the bread before wrapping up in the towel and placing in the banneton. I then place my banneton in the bag it came with. It is recommended to use rice flour because it doesn't contain gluten and will not absorb into your dough or allow it to stick to the surface of the banneton, liner or towel.
Alternatives: In place of a banneton you can use any bowl that's of proper size- like a mixing bowl or Tupperware bowl. In place of a liner you can use a flour sack towel or parchment paper (NOT WAX) and put your bowl in a plastic grocery bag. You do not need a flour dusting wand and can just use your fingers. I mentioned the reasoning above for using rice flour but I used AP and bread flour for years with no issues at all so it is not a must to purchase rice flour.
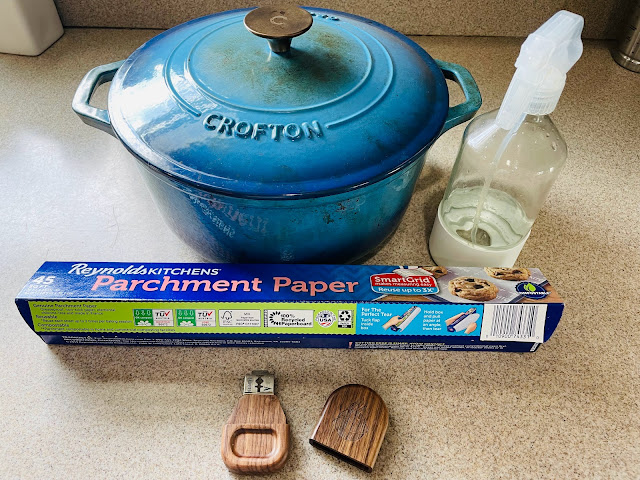
Bake day! I bake in a dutch oven. Once my oven is preheated with the dutch oven inside it. I take my dough out of the fridge, take it out of the bag and unwrap the flour sack towel. I place a sheet of parchment paper over the dough and invert it out of the banneton onto the counter. I score my dough with a lame and mist it lightly with a spray bottle. I throw two ice cubes into the dutch oven before lower the dough and parchment paper down and quickly cover with the lid to trap steam.
Alternatives: In place of a dutch oven you can use a stock pot or do an open bake on a dish or pizza stone. There are ways to create steam in your oven with different ways of baking that should be looked into based on how you're baking your bread. You do not have bake on parchment paper, you can put the dough straight into the dutch oven but I like pulling the finished bread out on parchment. Instead of a lame you can use a sharp knife to score your bread.
As you can see by my list of alternatives, you really do not need much to bake your first loaf of bread! Try baking with minimal tools and as you get more experiences you will get a feel for what items you may want to try out.


Comments
Post a Comment